

Add SAML SSO with Google for your ATS
This article describes how to configure Single Sign-on (SSO) with Google in your Applicant Tracking System, integrated with TAS.
Configure Google
Within Google you'll need to create an App for SSO using SAML.
-
On the left navigation pane, select Apps
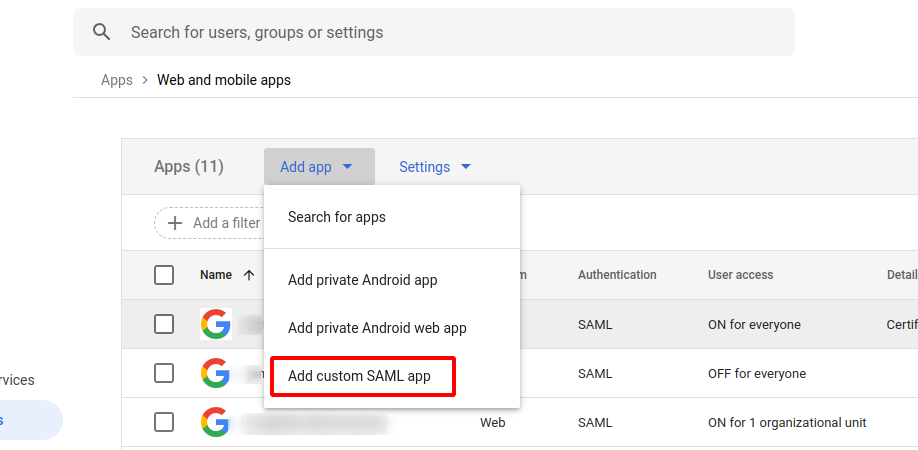
- Click on Web and mobile apps
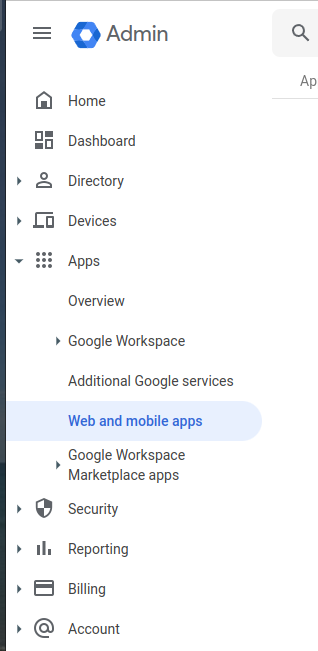
- Select Add app
- Select Add custom SAML app
- Enter the App name and Description fields. Feel free to add an App icon.
- Click the Continue button
- Click the Download Metadata button
- Click the Continue button
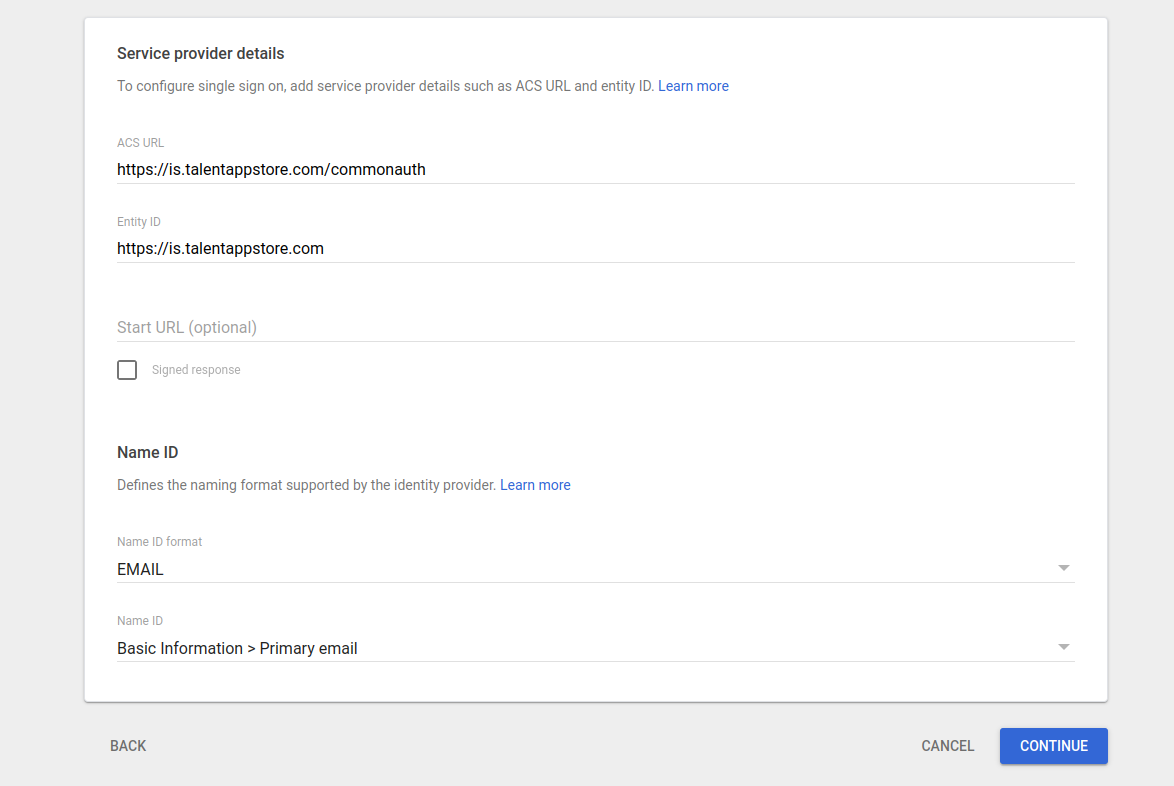
- Enter the ACS URL https://is.talentappstore.com/commonauth
- Enter the Entity ID https://is.talentappstore.com
- Select EMAIL for the Name ID format
- Select Basic Information > Primary Email for the Name ID
- Click the Continue button
- Then configure 3 attributes to be sent through:
Google Directory attributes
App attributes
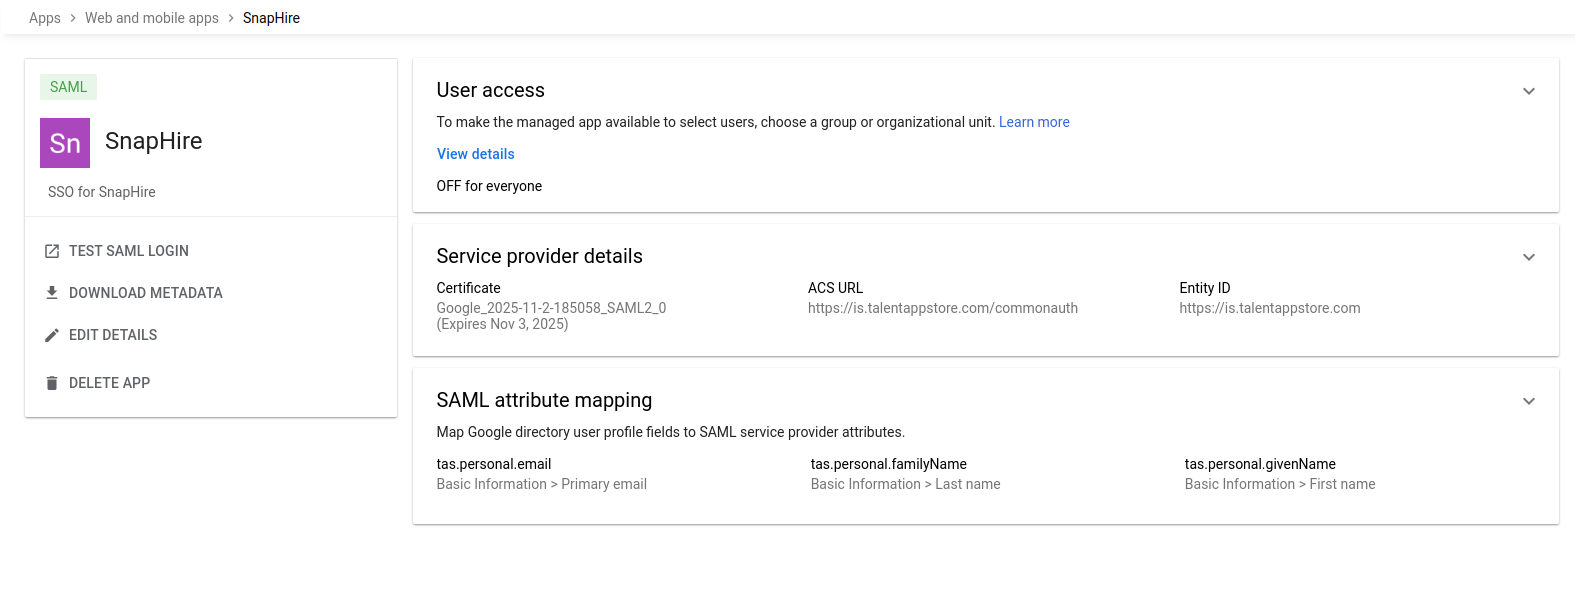
Basic Information > Primary email
tas.personal.email
Basic Information > First name
tas.personal.givenName
Basic Information > Last name
tas.personal.familyName
-
Click the Save button
-
You should now have something that looks like this
Configure your marketplace
The steps below apply to any TAS-powered marketplace (e.g. SnapHire Marketplace)
-
Within the Marketplace, browse to the Sign in with SAML app
-
Under the User Types tab, click Add user type button and configure with your Google metadata:
Field
Value
Usertype
User
Name
Choose an applicable name for users signing in with Google
Logo
Add a logo to be displayed next to your SSO option at sign in time
Metadata
Add the Google metadata you downloaded earlier
Signature algorithm
RSA with SHA256 (Default)
Digest
SHA256 (Default)
Nameid is email address
Ticked
-
Click Save
You should now have the option to sign in with Google when attempting to sign into your ATS.